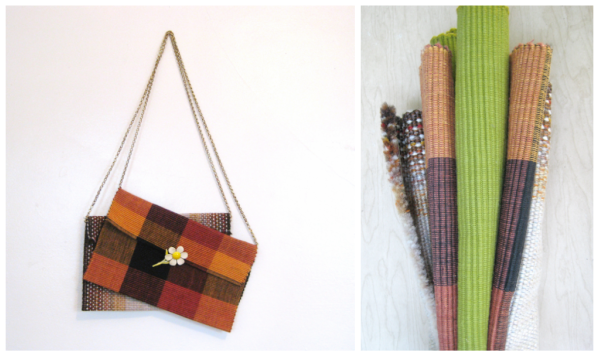
Hello everybody! Claire here, from Mamushka Marie - sitting in for Maria while she gets some well earned R&R with her man! I can't even tell you how excited I am to be guest blogging here at Lulu Letty, one of my all time favorite blogs! When I first started brainstorming for this weeks "farewell to summer" post, a couple of things came to mind immediately; the coming seasons trends, plaid and menswear standing out amongst the others and going back to school of course! It's true - once our adieus are complete a lot of us will be back in class, which means lugging books around in cumbersome backpacks, ugh! So a necessary accessory for the fall is a definitely going to be a lightweight carryall. I myself am completely obsessed with carpet bags and tapestry bags that I've seen recently while perusing street fashion blogs. The colors and textures of these bags are simply adorable. So what could be better to round off the summer than a quick and easy do it yourself "carpet" bag?!
Lets get started!
STEP 1: Supplies
You will need:
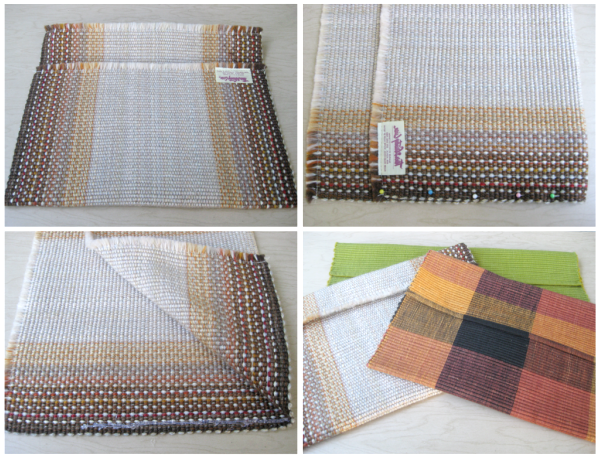
-Place-mats or a small rug/carpet square - I found my place-mats at a local thrift store for 50 cents each! I chose colors that reminded me of autumn, were a bit masculine and had wonderful textures. You could also use pretty floral mats which would be really cute! The options are limitless!
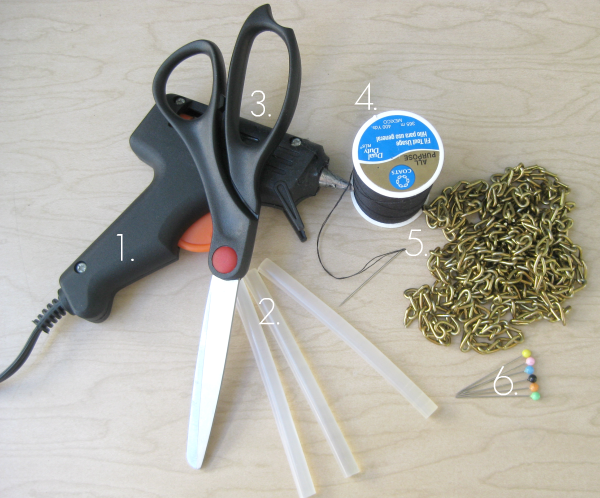
1. Hot glue gun
2. Glue sticks
3. Scissors
4. Needle & thread
5. Link chains
6. Pins
STEP 2:
Start by folding your place-mat or fabric about three quarters of the way, leaving about 2 to 3 inches in excess material for your bags closure flap.
STEP 3:
Pin the sides into place and sew closed (and/or) hot glue fabric together.
STEP 4: Pins/Brooches
Find a pin or brooch that will compliment the colors of your bag and is heavy enough to weigh down the excess material (if your pin is too light the fabric is likely to not stay closed) I had this lot of lovely vintage pins just lying around waiting for their next life! You could also easily attach some Velcro or a simple button for the closure.
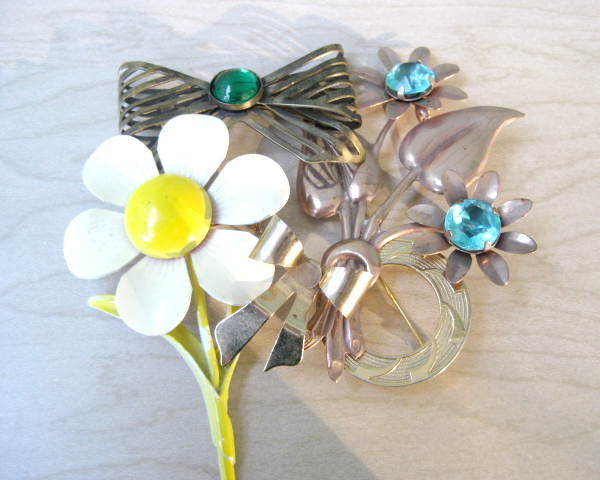
Pin your brooch towards the center of the bags closure flap.
STEP 5: Attaching the strap
Visit your local hardware store or craft store and choose a chain for the strap of your bag. The chain links for my bags were $1 a foot. I bought 3 feet of chain for each bag. The extra length allows you to wear your bag over your shoulder which is especially helpful if you ride a bicycle!
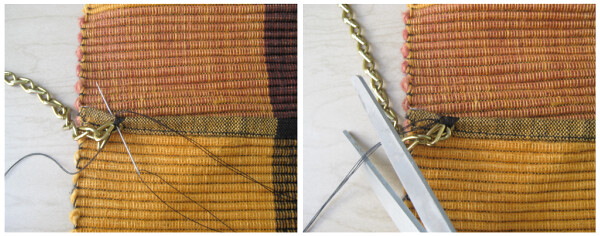
Attach the bags strap by sewing it into place with a needle and thread.
Lets get started!
STEP 1: Supplies
You will need:
-Place-mats or a small rug/carpet square - I found my place-mats at a local thrift store for 50 cents each! I chose colors that reminded me of autumn, were a bit masculine and had wonderful textures. You could also use pretty floral mats which would be really cute! The options are limitless!
1. Hot glue gun
2. Glue sticks
3. Scissors
4. Needle & thread
5. Link chains
6. Pins
STEP 2:
Start by folding your place-mat or fabric about three quarters of the way, leaving about 2 to 3 inches in excess material for your bags closure flap.
STEP 3:
Pin the sides into place and sew closed (and/or) hot glue fabric together.
STEP 4: Pins/Brooches
Find a pin or brooch that will compliment the colors of your bag and is heavy enough to weigh down the excess material (if your pin is too light the fabric is likely to not stay closed) I had this lot of lovely vintage pins just lying around waiting for their next life! You could also easily attach some Velcro or a simple button for the closure.
Pin your brooch towards the center of the bags closure flap.
STEP 5: Attaching the strap
Visit your local hardware store or craft store and choose a chain for the strap of your bag. The chain links for my bags were $1 a foot. I bought 3 feet of chain for each bag. The extra length allows you to wear your bag over your shoulder which is especially helpful if you ride a bicycle!
Attach the bags strap by sewing it into place with a needle and thread.
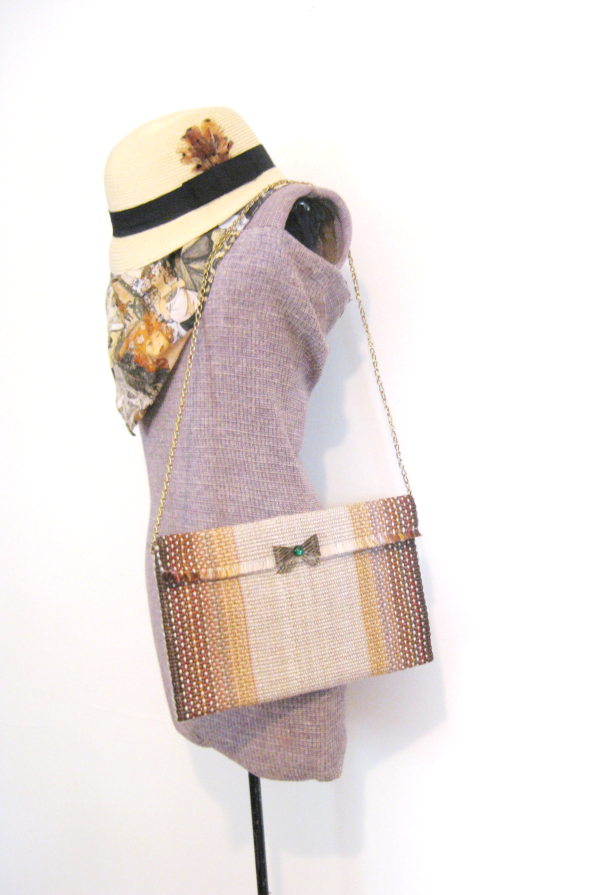
...and voila! You have yourself a perfect fall accessory, handmade and on the cheap!
Happy end of summer everyone!
Happy end of summer everyone!
Post Title
→D.I.Y - "Carpet" Bag
Post URL
→http://charlotte-lifesaboutthejourney.blogspot.com/2010/08/diy-bag.html
Visit Charlotte Lifes About The Journey for Daily Updated Wedding Dresses Collection


