Showing posts with label recipe. Show all posts

Mike's Blueberry-Peach Pie

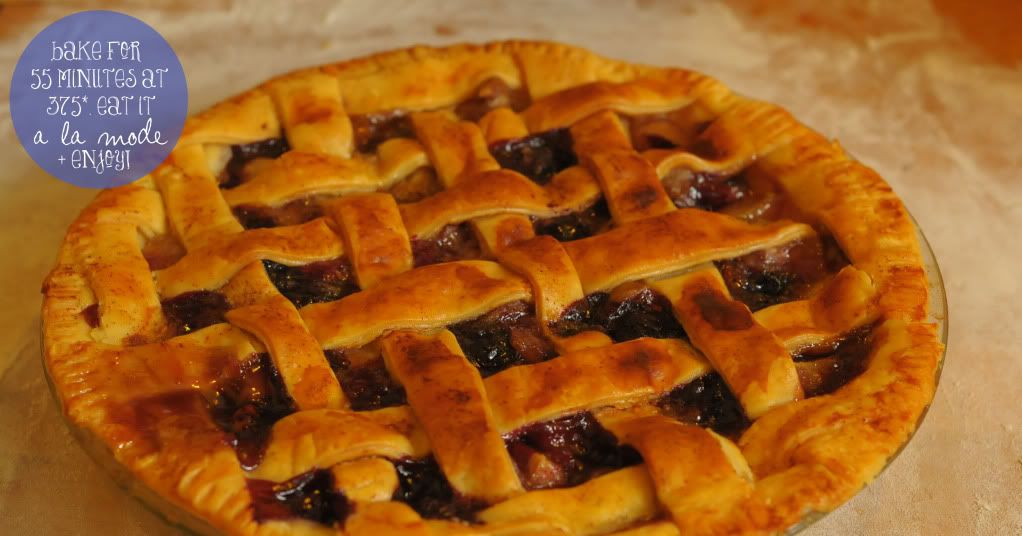
    I've been waiting for what feels like forever to post this recipe. Timing issues and scheduling aside, this pie is long gone in our house. We pretty much ate one piece each per day until the pie dish was totally clean. Yum! Mike threw this recipe together with absolutely no help from the internet or a cook book. I mean, pies really aren't all that hard... it's just baked fruit. So he mustered up some courage to just throw things in a bowl and cook it... and it was the most heavenly thing I've ever eaten! Seriously... sounds like a slightly strange combo but nothing beats it! Give it a whirl! (Edit: I didn't realize how small/hard to read the photos would be... Whoops! Too late. You can click on each one to see it larger or you can follow the typed out version below! Or maybe you have better eyesight than me!)
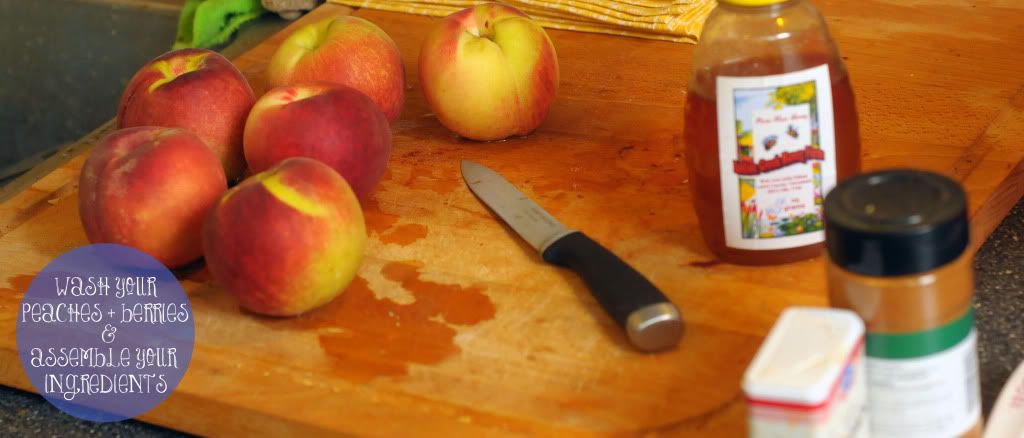

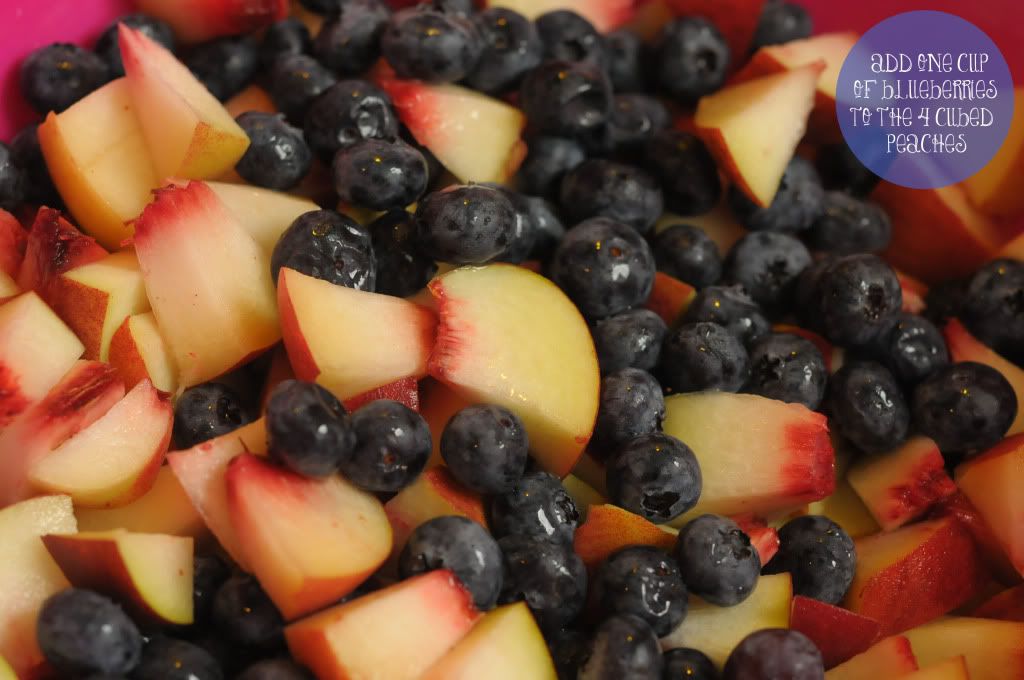
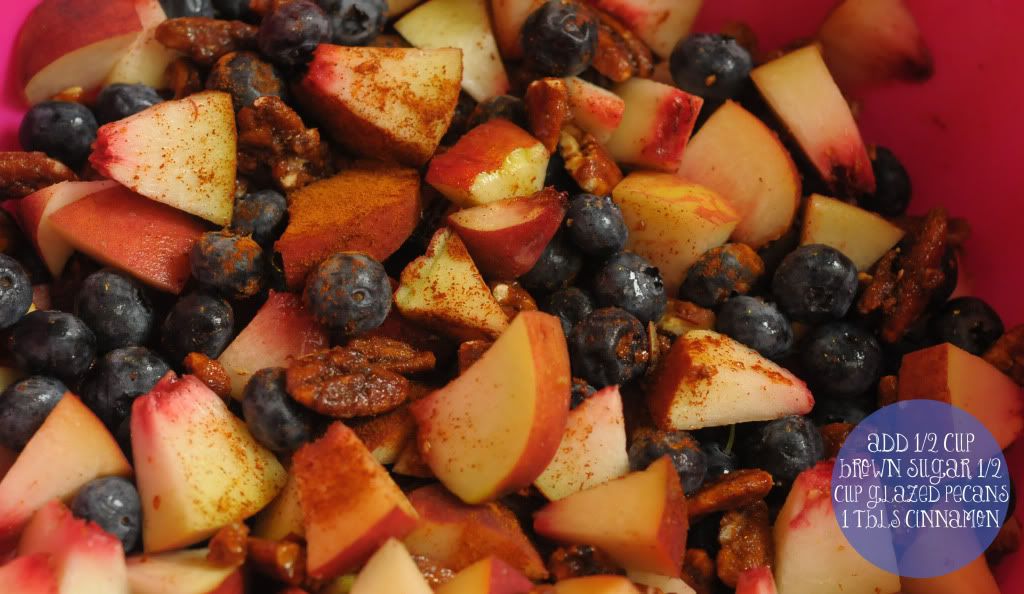
    Here's the typed version in case you want to copy + paste or print it out! It's seriously a ridiculously easy recipe! xo

    Ingredients:
    1 box of 9" pie crusts (2 total)
    4 peaches
    1 cup of blueberries
    1/2 cup of brown sugar
    1/2 cup of flour
    1 cup of sugar
    2 Tbls of honey
    1 Tbls of cinnamon
    1 stick of butter
    1/2 cup of glazed pecans (pre-packaged)

    Directions:
    Step one: Wash your fruit but leave skin intact. Line your pie dish with one 9" pie crust. (Lightly coat the bottom of the pie dish with butter.)

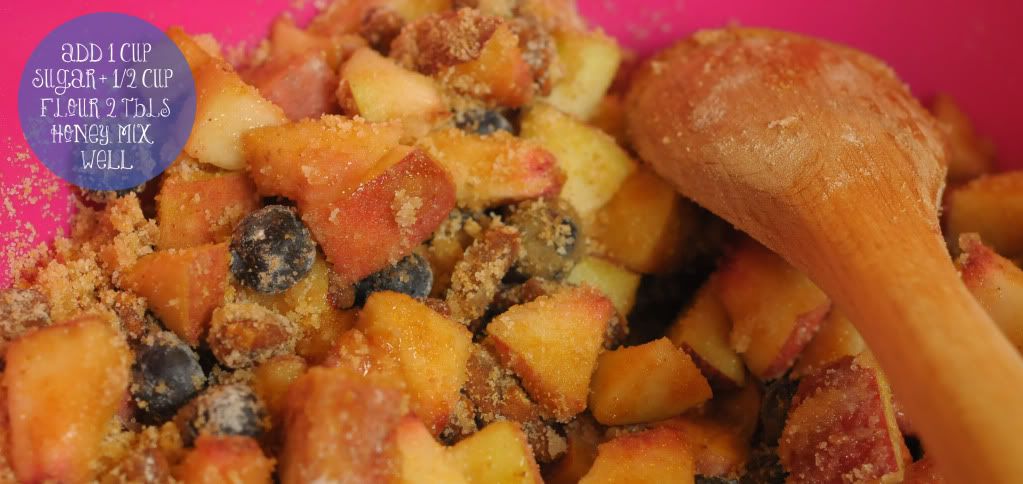
    Step two: Remove peach pits and cube peaches. 

    Step three: Add one cup of blueberries to the bowl. As well as 1/2 cup of glazed pecans

    Step four: Add all dry ingredients... 1/2 cup of brown sugar, 1/2 cup of flour, 1 cup of sugar, 1 tablespoon of cinnamon. Add 2 tablespoons of honey. Mix well.

    Step five: Add the pie filling mixture to the pie dish with the crust already laid out. Slice the remaining stick of butter and lay it on top of the filling.

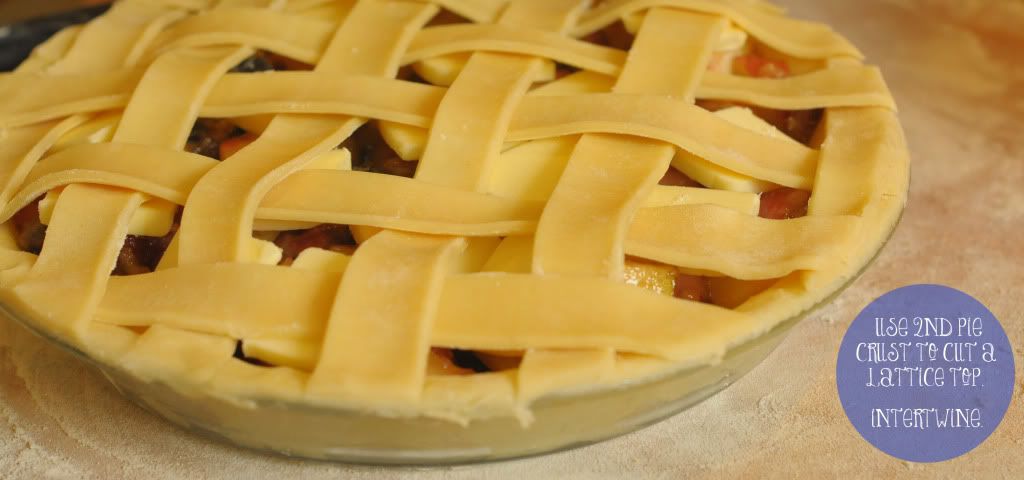
    Step six: Use the second 9" pie crust to create a lattice top. (Optional. You can have any type of pie top you wish, but c'mon... lattice is so pretty!)

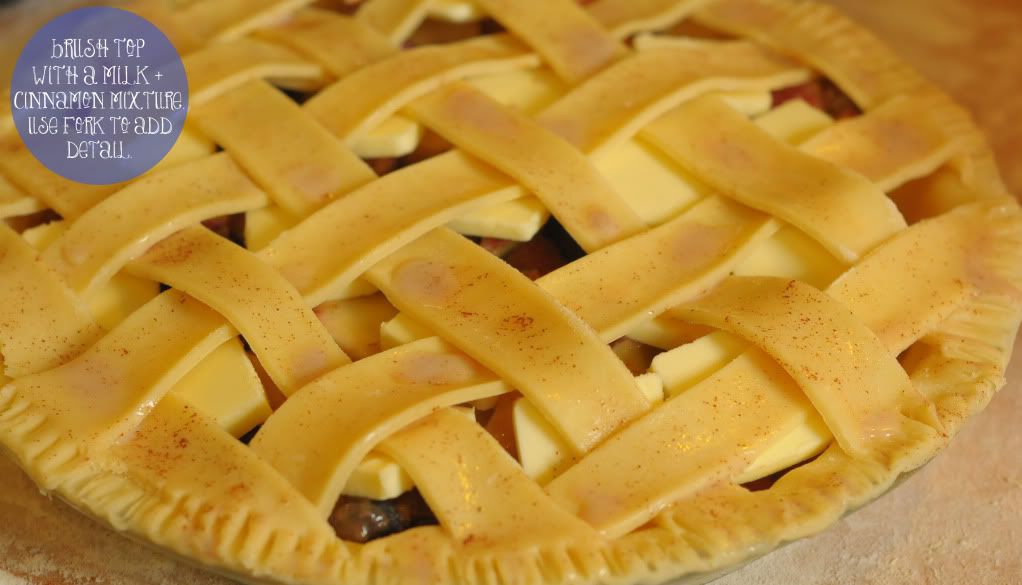
    Step seven: Brush a milk + cinnamon mixture on the top of the pie to help it brown in the oven.

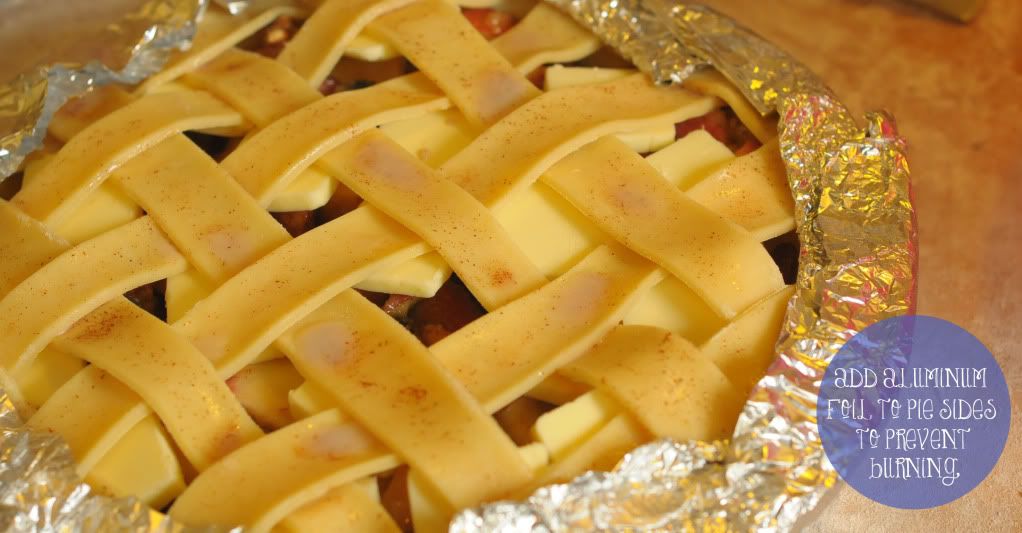
    Step eight: Cover the edges of the pie with aluminum foil to prevent it from burning.

    Step nine: Bake in the oven for 55 minutes at 375 degrees. Remove it and let it cool for 5 minutes.

    Step ten: Top it with vanilla bean ice cream and serve it a la mode! Enjoy!

    Please let us know if you decide to try it! I promise you you won't regret it! I'll be making some mini apple pies tonight to share later this week! Happy Monday, honeybees! xo

Post Title

Mike's Blueberry-Peach Pie


Post URL

https://charlotte-lifesaboutthejourney.blogspot.com/2011/10/mike-blueberry-peach-pie.html


Visit Charlotte Lifes About The Journey for Daily Updated Wedding Dresses Collection

Guest Post over at Love Elycia!

    Just a short post today (hey, I've got baked goods to eat, frogs to catch, extended family to hangout with and fireworks to watch!) to tell you I had a guest post over on Elycia's blog yesterday since she's on her honeymoon! I shared a scrumptious recipe for Banana, Peanut Butter & Chocolate Vegan Ice Cream! It's super simple, you only need 5 ingredients, a blender and your freezer.
    You can find the recipe here!
    Hope you're all having a wonderful weekend!
    xoxo

Post Title

Guest Post over at Love Elycia!


Post URL

https://charlotte-lifesaboutthejourney.blogspot.com/2011/07/guest-post-over-at-love-elycia.html


Visit Charlotte Lifes About The Journey for Daily Updated Wedding Dresses Collection

Vegan Banana Bread Recipe!

    I've loved this recipe for quite some time, but I was never sure if I should share it or not since I don't even like banana bread but it's one of Kevin's favorite snacks (sometimes I think he lets banana's get over rip so I have to bake a loaf!) and one of my favorite things to bake. It's a super easy and quick recipe, you don't even need a mixer!
    Vegan Banana Bread!
    (based on the recipe from The Baking Bird)
    3 very ripe bananas (nearly all brown)
    1/4 cup cinnamon applesauce
    1/4 cup canola oil
    1/2 cup sucanat sugar
    2 tablespoon molasses
    1 cup all-purpose flour
    1 cup white whole wheat flour
    3/4 teaspoon baking soda
    1 tablespoon ground cinnamon
    1/4 teaspoon ground nutmeg
    1/2 teaspoon sea salt

    Preheat the oven to 350 degrees fahrenheit. Lightly grease a 9x5 inch loaf pan.
    In a large mixing bowl, mash the bananas really well. Add the applesauce, oil, sugar and molasses, then whisk briskly to incorporate. Sift in the two different flours, baking soda, cinnamon, nutmeg, and sea salt. Mix the wet and dry ingredients together. If you're using chocolate chips or nuts, fold them at this point. Transfer the batter to the bread pan, sprinkle a dash of cinnamon on the top.
    Bake for 45 to 50 minutes. When done a knife or toothpick inserted in the center should come out clean. Remove from oven, let cool in pan for 10 minutes then transfer to a cooling rack.
    xoxo!

Post Title

Vegan Banana Bread Recipe!


Post URL

https://charlotte-lifesaboutthejourney.blogspot.com/2011/06/vegan-banana-bread-recipe.html


Visit Charlotte Lifes About The Journey for Daily Updated Wedding Dresses Collection

Guest Post: Katrina's Quinoa Salad Recipe!


    Hi everyone! I'm Katrina from The Demure Muse! Thanks so much for having me over here at Little Chief Honeybee.


    I can usually be found blogging about my daily outfits or jewelry making but today I'm here to share with you one of my most recent kitchen experiments. I hope you try it out this holiday season because I think the colors are perfect for the winter festivities!

    Quick disclaimer: This whole recipe was an experiment between myself, a meatetarian, and my friend who has newly converted to being a vegetarian. If you’re like me and have never heard of quinoa prior to this, it’s a pseudo-cereal that is extremely nutritious and is often considered a vegetable substitute due to its nutritional value instead of a grain.

    Vegetarian Quinoa Salad - serves 4

    What you’ll need:
    1. 2 cups of quinoa
    2. 4 cups of vegetable broth (or a mix of vegetable broth and water)
    3. 1 ½ cups of cherry tomatoes
    4. carton of fresh basil (add as desired)
    5. small block of feta cheese (or as much/little as you’d like!)


    First, we need to wash the quinoa. You may notice that the water that the quinoa is being washed in will have a bit of a “soapy” feel. I did two rinses before cooking the quinoa.


    Much like preparing rice, place a pot on the stove at medium to high heat with the vegetable broth in it. Once the broth comes to a boil, add the quinoa and put a lid on it. Remember to stir the quinoa every few minutes so that it doesn’t stick to the bottom of the pot. You’ll know when the quiona is ready because all of the broth gets boiled into the grains.

    While the quinoa cooks, you can prep the rest of the ingredients for the salad. The great thing about making this salad is the fact that there is relatively little “‘cooking” involved! From here, halve the cherry tomatoes and chop the fresh basil. We want the basil to be in relatively big pieces.


    Cut the feta cheese into about ½ inch cubes and then mix all of the fresh ingredients together in a separate bowl.


    By this time, your quinoa should be well on its way to being fully cooked. We were a little impatient when we made this first batch of salad and we mixed all the ingredients in with the quinoa while it was still extremely hot, which melted the feta cheese. Depending on how you like your salad, it might be better to let to let the quinoa cool down a bit before mixing everything together.

    Due to my meatetarian needs, I added a side of chicken. (I know, I know. I’m not the most supportive friend in terms of helping a newly converted vegetarian. I have a habit of forcing myself to have a balanced meal in terms of carbohydrates, vegetables, and proteins) I couldn't bring myself to have only a salad for dinner which is why I added the meat. I also added a small bed of spinach to my quinoa salad.


    I hope you enjoyed the recipe! :)

    --------------------------------------------------

    Big thanks to Katrina for her awesome recipe! I can't wait to try it! You can stop by Katrina's blog or shop if you'd like to learn more about her!

Post Title

Guest Post: Katrina's Quinoa Salad Recipe!


Post URL

https://charlotte-lifesaboutthejourney.blogspot.com/2010/12/guest-post-katrina-quinoa-salad-recipe.html


Visit Charlotte Lifes About The Journey for Daily Updated Wedding Dresses Collection

Recipe - Vegan "chicken" noodle soup.

    I've been craving chicken noodle soup (it's been about 4 years since I've had any!) and it's the perfect weather for soup here, rainy and cold! So I decided to hunt down the perfect vegan recipe, and then mix it with my mom's recipe. It turned out amazing, I'm super stoked. It was my first time making soup and really my first time cooking (other than ramen noodle soup, mac and cheese, etc) so I'm pretty proud!
     Vegan "Chicken" Noodle Soup.
    recipe modified from chowvegan.

    7 1/2 cups water
    1 1/2 tablespoons vegan chicken base bouillon
    1 tablespoon oil
    1/2 small onion, chopped
    1 medium green onion, sliced into 1/8″ rounds
    3 medium carrots, sliced into 1/8″ rounds
    2 celery stalks, sliced
    2 bay leaves
    oregano to taste (i like lots!!)
    1/2 teaspoon granulated onion powder
    Salt and pepper to taste
    1 8-ounce package MorningStar meal starter chik'n strips
    2 tablespoon parsley
    4 ounces of noodles of your choice.

    Dissolve the bouillon in the 7 1/2 cups of boiling water, set aside.
    Heat the oil in a soup pot over medium heat. Add the onions and green onions, sauté until translucent. Add the carrots and celery and sauté for another 2 minutes. Be careful not to burn any of the items.
    Add the bouillon broth, bay leaves, granulated onion, oregano, salt and pepper to the ingredients you just sautéd. Increase the heat to bring to a boil, then turn down to simmer for about 5 minutes. Stir occasionally.
    Add the "chicken" pieces, parsley and the noodles. Bring to a boil and reduce to simmer for 15 minutes. Stir occasionally to make sure all the noodles get cooked. Discard the bay leaves before serving.
     The recipe doesn't make a lot, so if you're making this for more than three people double the recipe!

    I have to mention the one thing I don't like about cooking - recipes are meant to bent. Meaning if you like your soup thicker, don't add so much water (around 5 1/2 cups would give you a thick soup in this case). Next time I make this I'm adding more carrots, and less noodles.

    This tasted just like how I remember my mom's chicken noodle soup tasting and the whole house smells so yummy.  I think it's safe to say if you try this recipe you won't be disappointed!
    xoxo

Post Title

Recipe - Vegan "chicken" noodle soup.


Post URL

https://charlotte-lifesaboutthejourney.blogspot.com/2010/11/recipe-vegan-noodle-soup.html


Visit Charlotte Lifes About The Journey for Daily Updated Wedding Dresses Collection

Vegan Peanutbutter Cups - Recipe

     
     I have a super easy, yet ridiculously scrumptious recipe - vegan peanut butter cups. I'm sorry if you gain 15 pounds after making these, they are addicting!   Here's what you need:
    • A dash of salt.
    • 1/2 teaspoon of vanilla.
    • 1 bag of vegan chocolate chips.  (I like this kind)
    • 3 large spoonfuls of peanut butter. (this is a large spoonful to me)
    • Mini cupcake papers.
    Directions;
    Melt your chocolate thoroughly using a double boiler (or if you don't have one use two pots stacked like I do!) When it's melted neatly coat (not fill) the inside of the mini cupcake papers 3/4 of the way up with a thin layer of chocolate using a small spoon. Do this to approximately 20 cupcake papers then place them on a plate and put them in the freezer to harden.

    While you're waiting, prepare the peanut butter mixture by putting the peanut butter in the microwave for 15 seconds (just long enough to make it easy to work with) then stir in the salt and vanilla. When the peanut butter is cooled down take out your chocolate covered cupcake papers and spoon the peanut butter mixture in. Do not fill it higher than you've made the chocolate. Then put a thin layer of chocolate on the top of that and pop in the freezer!
    They'll be ready to eat in about 10 minutes but I've found they taste better after at least 10 hours in the freezer (the peanut butter is a much nicer texture.)
    What kind of peanut butter should you use?  Well, I prefer creamy peanut butter in these, while Kevin prefers crunchy. They taste completely different, so I definitely recommend trying both!
    Enjoy!!
    xoxo

Post Title

Vegan Peanutbutter Cups - Recipe


Post URL

https://charlotte-lifesaboutthejourney.blogspot.com/2010/11/vegan-peanutbutter-cups-recipe.html


Visit Charlotte Lifes About The Journey for Daily Updated Wedding Dresses Collection

Foodie Feature: Mike's Veggie Pasta

    We're back with another Foodie Feature installment! It's been a bit since we've done one of these but we have a few recipes we're excited to share. We thought we'd keep this one really simple (and because we had it for dinner tonight!). It's pretty much fool-proof so I bet I could even make it! Enjoy! 

    Veggie Pasta


    Ingredients:
    1/2 Yellow Squash
    1/2 Zucchini
    1/2 Red Bell Pepper
    1/2 a bag of Fresh Broccoli
    Small bit of Basil
    Pasta
    Salt
    Pepper
    1 jar of Pasta Sauce

    Steps:


    1. Heat frying pan on medium high heat and in another pot bring water to a rolling boil. Meanwhile cut vegetables into desired size (we use quarters).


    2. When frying pan is at cooking temperature, add 2 tablespoons of oil and then cup up vegetables. Cook vegetables until golden brown. Add pasta to pot of boiling water.


    3. When the vegetables are done, mix pasta and sauce into the same pan. Cook until sauce is fully heated. Cut up basil and toss in.


    4. Plate the pasta and top with desired cheese (Parmesan, Mozzarella, etc). Voila!


    It's really that simple! And so yummy! I think it's hands down the best way to eat pasta. I love veggies anyway, but I don't think I could eat regular ol' pasta again! 

Post Title

Foodie Feature: Mike's Veggie Pasta


Post URL

https://charlotte-lifesaboutthejourney.blogspot.com/2010/11/foodie-feature-mike-veggie-pasta.html


Visit Charlotte Lifes About The Journey for Daily Updated Wedding Dresses Collection

Vegan Buttercream Frosting

    This frosting is the perfect compliment to the Vegan Pumpkin Spice cupcake recipe I'm sharing on Elsie's 12 Day's of Tricks and Treats (hello and welcome if you've found your way here from there!). Although that isn't the only thing you could frost with it, it's absolutely delicious!
    Vegan Buttercream frosting
    1/2 cup vegetable shortening
    1/2 cup margarine 
    3 1/2 cups powdered sugar
    1 1/2 teaspoons vanilla extract
    1/4 cup soy milk 
    Beat the shortening and margarine together until fluffy (about 4mins). Add sugar one cup at a time and beat again until fluffy and fully combined. Add the vanilla extract and soy milk, and beat for another 6 to 7 minutes until fluffy and stands well.
    If necessary add more powdered sugar 1/2 cup at a time until it's the perfect consistency for you!

    Note: I just want to mention this recipe is all about mixing! Make sure to mix absolutely thoroughly (6 or 7 minutes) between adding ingredients. If not mixed well it will be runny, and most likely melty.

    Also try: adding a tablespoon and half of cinnamon to the frosting for perfect dash of flavor for fall!

    Enjoy!
    xoxo!

Post Title

Vegan Buttercream Frosting


Post URL

https://charlotte-lifesaboutthejourney.blogspot.com/2010/10/vegan-buttercream-frosting.html


Visit Charlotte Lifes About The Journey for Daily Updated Wedding Dresses Collection

Recipe- Vegan Chocolate Chip Cookies

    Chocolate chip cookies- super easy right? Well not when you're really picky! I'm extremely particular about textures of food, it can taste awesome but if the texture is "wrong", I won't eat it.

    This is, I guess you could say, a popular recipe. Except for the fact it's not vegan, so here is what I did.

    Vegan Chocolate Chip Cookies
    (original, non-vegan here)
     Ingredients:
    • 2 1/4 cups all-purpose flour
    • 1 teaspoon baking soda
    • 1 teaspoon salt
    • 1 cup vegan butter. (I use smart balance brand)
    • 3/4 cup granulated sugar
    • 3/4 cup packed brown sugar
    • 1 teaspoon vanilla extract
    • 2 "eggs" (I use Ener-G )
    • 1 bag vegan chocolate chips (I use Enjoy Life)
    Directions:
    Preheat oven to 375° F.
    Combine flour, baking soda and salt in small bowl. Beat butter, granulated sugar, brown sugar and vanilla extract in large mixer bowl until creamy. Add "eggs". Gradually beat in flour mixture. Stir in chocolate chips. Spoon onto ungreased cookie sheet. 
    Bake for 8-10 minutes. Let cool on cookie sheet before storing. Do not stack while cooling or storing without a layer of parchment paper in between. 
    Overview:
    Would I ever make it again?   

    • Oh my gosh, YES! YES! YES!
    Pros?
    • Best cookies ever.
    • Quick and easy. 
    • You know that fresh out of the oven cookie taste? It has that for days. So gooey and good!
    Cons?
    • Batter is so sticky, I prefer to make balls of cookie dough instead of spooning dough.
    • I hate using egg replacer...
     Notes:
    •  Um, have I mentioned these are delicious yet? The original recipe is the one my mom always used (so they've always been my favorite) but I just recently started making the vegan version for Kevin. I honestly like them better than the original. They have the PERFECT cookie texture!
    • Like I briefly mentioned before, you don't want to stack the cookies. You'll never get them apart without breaking them!
    • My oven runs a little hot, things tend to cook quicker in my oven than any other I've ever used. The cookies won't look done at 8 mins but that's when I take them out, after cooling on the cookie sheet for a few minutes they start to look done, and not so much like a pile of batter.
    • I also wanted to mention that those chocolate chips I linked to up there are not very tasty straight out of the bag, they taste bland. But don't be put off, they are amazing after you bake them.
    xoxo.

      Post Title

      Recipe- Vegan Chocolate Chip Cookies


      Post URL

      https://charlotte-lifesaboutthejourney.blogspot.com/2010/09/recipe-vegan-chocolate-chip-cookies.html


      Visit Charlotte Lifes About The Journey for Daily Updated Wedding Dresses Collection

      Foodie Feature: Mike's Garlic + Basil Naan Pizza

        This is a great and fun recipe if you're home alone or not super hungry, or well... you're like me and you really just fail at all things cooking related. There's NO cooking involved! Except a small stint in the oven just to melt/toast it all! Even I can do that, people! So I know you can, too! Mike is a pizza LOVER! I mean LOVER. And I am not really a fan all that much so this was a nice compromise for the two of us. It's really yummy and so so simple! The rest is allllll Mike! Enjoy!


        Garlic + Basil Naan Pizza


        Ingredients:

        • Fresh mozzarella (not the stuff in a bag. look for it in a package in the deli area. it will clearly say "fresh mozzarella."
        • Fresh basil
        • A pack of garlic naan bread
        • A jar of you favorite tomato sauce (I used "fire roasted tomato and garlic")
        • Extra virgin olive oil
        • Ground black pepper
        • A tall frosty beer for the chef (totally optional)

        Garlic + Basil Naan Pizza

        Step one:
        Lay out your desired number of naan breads on a baking sheet. (Cooking these on a baking sheet will yield a soft chewy crust with crispy edges while cooking them directly on the rack will result in a crust that is crispy all the way through. I prefer them on a baking sheet but you decide what's right for you) use a pastry brush or a clean set of hands to brush the bread with a light coat of olive oil. After the olive oil I usually toss on just a pinch of black pepper.

        Garlic + Basil Naan Pizza

        Step two:
        Take your tomato sauce and use a spoon to spread it evenly around the top of the bread leaving just a little bit of a border on the outside so you have a nice crust when it's done. Now take some of your basil (not all of it) and sprinkle it evenly on top of the tomato sauce.

        Garlic + Basil Naan Pizza

        Step three:
        Take your shredded mozzarella and spread in evenly on top of your pizza. use as much or as little as you like. Sometimes the fresh mozzarella is a little tough to grate. the best way to do it is to used the big holed sized of the grater and use light pressure. It's ok that it crumbles apart (and it will) because you can use all those crumbles too. It's just cheese and it's all going to look the same after it spends a little time in the oven.

        Garlic + Basil Naan Pizza

        Step four:
        Take the rest of your basil and spread it out evenly on top of the cheese. Now really really really lightly drizzle olive oil over the whole thing and then crack some pepper on top of it just to finish it off.

        Step five:
        Place your pizza(s) in an oven that has been preheated to 350. let it cook for about 12-15 minutes. You're looking for melted cheese and a golden brown edge on the crust.

        Garlic + Basil Naan Pizza

        Step six:
        Nom.

        We served our Naan pizzas with a side of vegetables. This is completely optional of course! 

        Side of Vegetables

        Let us know if you decide to try it!

        xoxo

      Post Title

      Foodie Feature: Mike's Garlic + Basil Naan Pizza


      Post URL

      https://charlotte-lifesaboutthejourney.blogspot.com/2010/08/foodie-feature-mike-garlic-basil-naan.html


      Visit Charlotte Lifes About The Journey for Daily Updated Wedding Dresses Collection

      Popular Posts

      My Blog List

      Blog Archive